Parametric queries prompt you at runtime for values for certain parameters prior to the query being run. They are supported for Identity, Name, Key, Level and free-format categories (including picklists).
You are prompted for values when the query is run from the following places:
Query Details dialog
Definitions sidebar
Phase tree
As part of a report
When performing an export by query
A start page
From the Query dialog press the arrow button next to the field you want to set the prompt for and select “Choose at Runtime“. This produces the “Runtime Parameter Definition” dialog where you can setup the parametric query prompt:
You can also specify more than one parametric in the query dialog. This can prove very useful in simplifying the interaction in not having to use the full query details window.
When you run a parametric query the prompt will be shown. An example is shown below:
Parametric queries are supported in both WorkBench and Web Access.
Multiple data cells are a useful way to combine a number of attributes in a single view cell. However, unlike other cells, the contents of Multiple Data cells can’t be copied in the same way. However, copying text from Multiple Data cells is still possible.
Usually, when in the Table or Document view styles, to copy the text contained in a cell you can simply click the cell to make it editable, select the text and use a keyboard shortcut (<ctrl> + C) to copy.
A Multiple Data Cell can use data from different sources. This means all cells of this type are uneditable from within a View. For this reason the method used to copy the contents of the cell is different from a standard Text Frame or Category, for example.
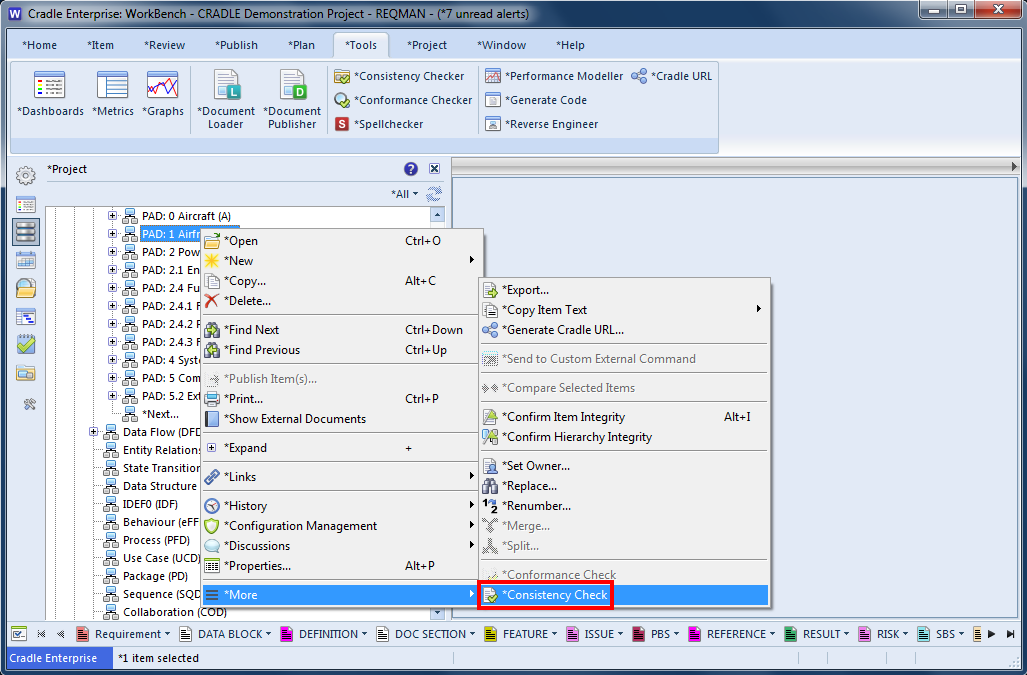
To copy the text contained within a multiple data cell, select the item which has the text you wish to copy and right-click to open the context menu. Once the context menu is open, select More -> Copy Item Text -> Multiple. The contents of the multiple data cell for the selected item will now be in your copy/paste buffer.
Article Updated 04/02/2019 – Added an image showing the setup of a multiple data cell
Sick of having to start from scratch when working with large documents in Document Loader? Want to save your current progress and return at a later date?
You can use a session to save a snapshot of Document Loader, so you can return to the same point at a later time. Sessions are useful when working with large documents or if you need to shutdown your PC for any reason.
What is a Session?
Sessions store information about the state of Document Loader at a given point, such as:
A copy of the current document
A copy of the current capture setup definition
Which parts of the document have already been captured
The state of the Document Explorer tree nodes
Any mappings, e.g. table mappings
Any changes made in the Options dialog
How can I save a Session?
You can only save a session when working with a new document; not a new version of a document. You can save a session at any time, so long as you have a document open.
To save a session you can either:
Press the Save Session button button from the Toolbar
Select Save Session from the File pulldown menu
Press Ctrl + S (The Status Bar shows the progress of the Save operation)
How can I load/restore a Session?
To load a saved session you can either:
Select Load Session from the File pulldown menu
Press Ctrl + L If you attempt to load a session with a document open you will be prompted to close the current document. The Load Session dialog will be displayed as shown below:
Simply identify the session you wish to load and select it in the list. You can sort on any column by clicking on its column heading; click once for ascending order and again for descending order. Click the OK button to load the selected session.
How can I delete a Session?
To delete a session you need to open the Load Session dialog by either:
Selecting Load Session from the File pulldown menu
Pressing Ctrl+L Select the appropriate session and press the Delete button. Select Yes to confirm the deletion and Cancel to remove the Load Session dialog.
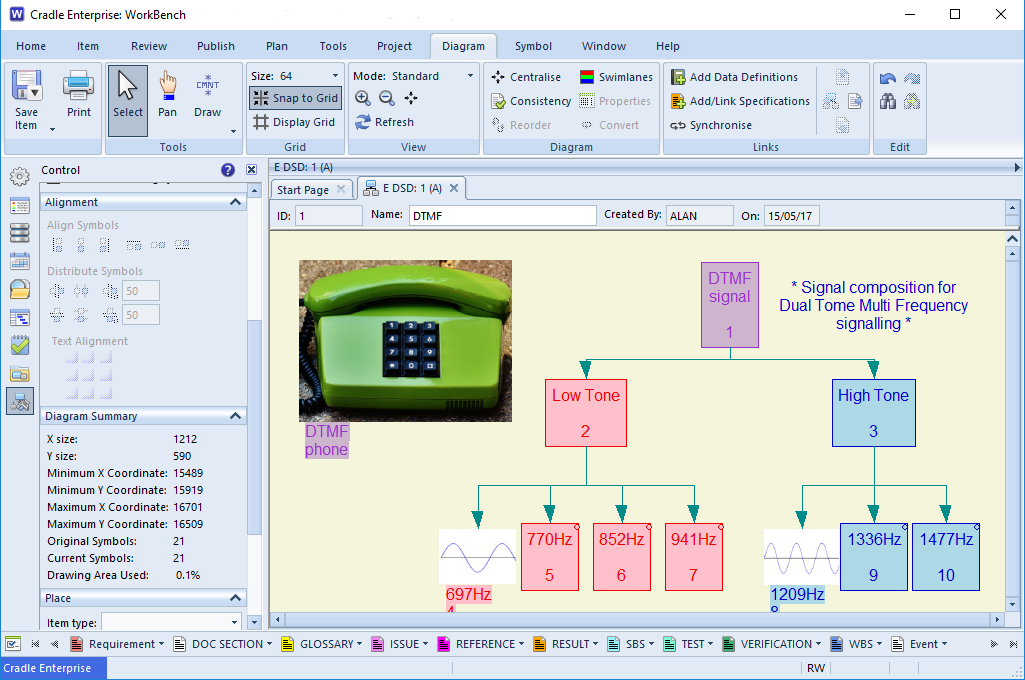
Whatever your Systems Engineering tasks you can use diagrams to illustrate the various components. In classic functional modelling the Essential domain shows the operational, theoretical, side of the design, and the Implementation domain models the actual real world components.
The Context Diagram shows the entire system or subsystem as one process with the exchanges of information between it and its environment. In today’s example, this is the ‘Death Star‘ , the external environment being the universe!
From the context diagram a set of hierarchical Data Flow Diagrams (DFDs) give a view of units of functionality and the exchanges of data between these units. So we would expect DFDs covering the Emperor’s Tower, Surface City, Superlaser Focus Lens and so on. So May the Fourth Be With you, and all your modelling.
Do you want to run your reports faster or wish you could run them overnight or at weekends so they are ready when you arrive at work in the morning? With batch file reports, you can do this quickly and easily.
What is a Batch File?
A batch file contains a series of DOS commands, and is commonly written to automate frequently performed tasks including publishing reports and documents. Instead of typing the same commands over and over in a Command Prompt, you can simply double-click the batch file or use Windows Task Scheduler to set it running during down times e.g. over night or weekends which then creates all the reports you require.
The following report will show you how to create a batch file for these reports.
How to Write a Batch File for Reporting
Using a plain text application like Notepad, you need to first set the folder the application to be used is in. In this case, it is in the same place all Cradle applications are held, the command does need to be surrounded by quotes
“%CRADLEHOME%\bin\exe\windows\c_table.exe”
You then need the login information to the project that you would normally would when using a Command Prompt.
-login admin,ADMIN,demo or -login reqman,REQMAN,demo
After these 2 necessary parts, you need the options for the report; you can find these options in our online Help System for c_table. If you are already in the Command Prompt in the correct location then just type in c_table and you will see the Information popup.
Once you have finished writing you batch file, the command should look something like this:
Remember to put quotes around any options with spaces in them e.g. “Requirements – All”
Save this file using the DOS extension of .bat e.g. batch file reports.bat
How to Run a Batch File for Reports
Running a batch file is simple, as long as all the options in the commands are correct; just double click on the .bat file. You will see a Command Prompt open and as each report finished, the next will begin.
As you will see running batch file reports is quicker and easier. You can also then add any reports you require to the file. The newly added reports are then also published the next time you run the batch file.
If you wish to use Task Scheduler for out of hour’s usage, you can find information here on the Microsoft website.
You can also use batch files for import and exporting through the c_io, publishing documents through Document Publisher and converting CSV information into a Cradle import/export file for loading into a Cradle PDB using the CSV Converter Utility.
You can expand and collapse items shown in a table in Table view or Document view displaying linked items in views. This is similar to expanding nodes in a tree using the current navigation. When an item is expanded (double click the number in the first column) in a table, a dot(.) is displayed in the first column representing the level:
When setting up a new project it is very likely that you will have a number of users who need the same access and privileges. Copying a user’s role you have set up for one user to use as a template is the easiest way to do this.
Create the first user and set up all their privileges. Save this user.
Choose ‘Save Role…” to create a template from this current user
Use ‘New…‘ to create a new user and give them a unique name.
Use ‘Select Role… ‘ to choose the role saved in the previous steps, choose how much of the template you want to apply.
Read the help for further information on setting up users, and roles.
The prize consists of one licence for the current version of Cradle RM Desktop. The features of which are defined on our products page. Support is 7 day installation assistance after download.
*The value of the prize is that defined on 01/05/2017 in the Cradle shop.
This is a free to enter draw. Entry is open between 9:00am 01/05/2017 GMT and 23:59 GMT on #FreebieFriday 05/05/2017
The draw will take place on Monday 08/05/2017 before 10:00 eligible entrants must have retweeted and followed @threesl
Terms and Conditions
The promoter is: 3SL (Structured Software Systems Ltd.) Suite 2, 22a Duke Street, Barrow-in-Furness, Cumbria, LA14 1HH UK Registered in England: 2153654
Employees of Structured Software Systems Limited or their registered distributors, or their family members or anyone else connected in any way with the competition or helping to set up the competition shall not be permitted to enter the competition.
Entrants must be 16 years or older.
There is no entry fee and no purchase necessary to enter this competition.
The cost of Tweeting to enter and communications for the winner and downloading software are not covered.
Route to entry for the competition and details of how to enter are via Twitter.
Closing date for entry will be 23:59 GMT on 05/05/2017. After this date/time no further entries to the competition will be permitted.
No responsibility can be accepted for entries not received for whatever reason. ‘Receipt of entry’ shall be classed entrants showing in the list of @threesl followers on Twitter at the time of the draw and a notification of retweet from Twitter. If there is a doubt as to the timing of these events, the time stamped notification email from Twitter shall be used to decide.
The rules of the competition are described here on the 3SL website and the Tweet shall only be considered as an ‘invite to enter’.
The promoter reserves the right to cancel or amend the competition and these terms and conditions without notice in the event of a catastrophe, war, civil or military disturbance, act of God or any actual or anticipated breach of any applicable law or regulation or any other event outside of the promoter’s control. Any changes to the competition will be notified to entrants as soon as possible by the promoter.
No cash alternative to the prize will be offered. The prize is not transferable. Prize is subject to availability and we reserve the right to substitute any prize with another of equivalent value without giving notice.
A winner will be chosen at random (based on a third party random number generation) from all entries received and verified by staff of the promoter.
The winner will be notified by a direct Twitter message within 28 days of the closing date. The winners details will be posted on the 3SL Website and via a Tweet and any other social media promotion chosen by the promoter. If the winner cannot be contacted or does not claim the prize within 7 days of notification, we reserve the right to withdraw the prize from the winner and pick a replacement winner.
The promoter will notify the winner how the prize can be downloaded and activated.
The promoter’s decision in respect of all matters to do with the competition will be final and no correspondence will be entered into.
The competition and these terms and conditions will be governed by English law and any disputes will be subject to the exclusive jurisdiction of the courts of England.
The winner agrees to the use of his/her name / (Twitter ID) and image in any publicity material. Any personal data relating to the winner or any other entrants will be used solely in accordance with current UK data protection legislation and will not be disclosed to a third party without the entrant’s prior consent.
The winner’s name (chosen Twitter ID) will be available 28 days after closing date by sending a stamped addressed envelope to the following address: 3SL (Structured Software Systems Ltd.) Suite 2, 22a Duke Street, Barrow-in-Furness, Cumbria, LA14 1HH.
Entry into the competition will be deemed as acceptance of these terms and conditions.
This promotion is in no way sponsored, endorsed or administered by, or associated with, Twitter or any other Social Network. Interactions on Twitter are governed by their privacy rules. All other information supplied is to 3SL and not to any other party. The information provided will be used in conjunction with the standard 3SL Privacy Policy.
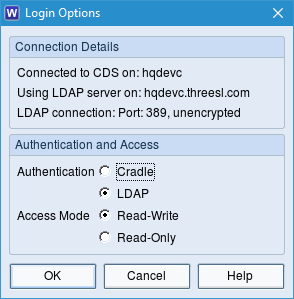
Users can be disconnected and their licences released by another user from Project Manager without the need of restarting the CDS.
This could be useful in the following circumstances:
A user has left a login dialog open locking a RW connection
A user has locked a licence and cannot manually release it
You have locked a project for maintenance and need to remove users while the maintenance is carried out
Solution
Disconnect your users through Cradle’s Project Manager. To disconnect a user select User Management… from the System pulldown menu which produces a User Management dialog, from here you can see details of all connections to the CDS, select a user and then choose Log Off. This will kill the connection and free up any licences they had in use.
When running a basic item query all items of that type that the user is allowed to see are returned. As a project grows this number may become quite large, it therefore becomes necessary to add additional filtering criteria, such as the date. Querying on dates allows you to filter by the modification or creation date of an item.
Relative and Absolute Dates
You may have a good enough memory to remember it is the item you created on the 24th that you want to return. Choosing ‘Specify:‘ from the drop-down will enable a date picker. However, it is much more likely that you’ll want a range of dates, as you want to run a query each Thursday to find the new ‘issues’ raised in the last week. Relative dates allow you to do this, choosing ‘Start of last week’ and ‘Today‘ would give the data required. The benefit of the relative date specification is that the query can be saved. It can then be run next week to give a new set of values.
Specific Dates
An item’s creation or modification date may not be something that you can directly control. It certainly can not be set in the future. If a data entry clerk enters all emails as items on a Friday they’ll all have the same creation date. Equally updates will change the modification date making an old item appear more recent. Categories can be set to hold abstract data of type Date, this would allow a value such as “Review Date” to be set, and then queried upon. This data is based on a user input value and not the automatic dates recorded by Cradle.
Availability
This filtering functionality is available wherever queries can be run. This includes WorkBench, Web Access, C_IO command line tool and the Cradle API.