It’s National Poetry Day 2017 – Why not have a go?
#NationalPoetryDay 28th September 2017 Freedom
An Engineer’s Lot

Their requirements, and constraints to be met.
My design freedom to inspire and innovate,
Love being an engineer.
#NationalPoetryDay 28th September 2017 Freedom

Their requirements, and constraints to be met.
My design freedom to inspire and innovate,
Love being an engineer.
We are sometimes asked about storing project databases in NAS (network attached storage), is it possible, is it a good idea, and how to do it.
Network attached storage is a type of storage device that attaches directly to a network. It is typically a RAID array of disks with one or more interfaces and some management software. It provides network storage without a need to manage a server with attached storage.

Each Cradle project database is a directory of files and subdirectories. It can be stored anywhere. So, yes, you can store a Cradle database on a NAS device.
Since the NAS device is not a server in the normal sense, it will not be running any part of Cradle and, in particular, will therefore not be running the Cradle Database Server (CDS).
Therefore storing Cradle database(s) on a NAS device means that you are storing them remote form the CDS.
For the same reason, you can store a Cradle project database on a server that is separate from the computer that runs the CDS.
Therefore storing Cradle database(s) on a separate server means that you are storing them remote form the CDS.
If you don’t have a server in your network, then a NAS device is a cost-effective means to add centralised storage.
NAS devices are often used to collate data for backup. Storing Cradle databases on a NAS device eliminates the need to copy the databases onto the NAS device for backup.
Not storing Cradle databases on the machine that runs the CDS adds considerable latency between the CDS and the disk(s) that store the databases. Increasing latency worsens the performance of the CDS.
In general, we do not recommend storing project databases in NAS or indeed in any network-based resource.
If possible, only store your Cradle databases on the machine that runs the CDS and backup your databases regularly!
One of the most popular vacations is the package holiday. A Package Diagram is a popular SysML grouping of system components. It shows components and sub systems in a hierarchical manner. In the same way as our Package Holiday would contain flights, accommodation and possible a day out or two. Your system may comprise of housings, machinery and software or packages. It may contain, tablets and microbial formula or road networks, service stations and petrol pumps.
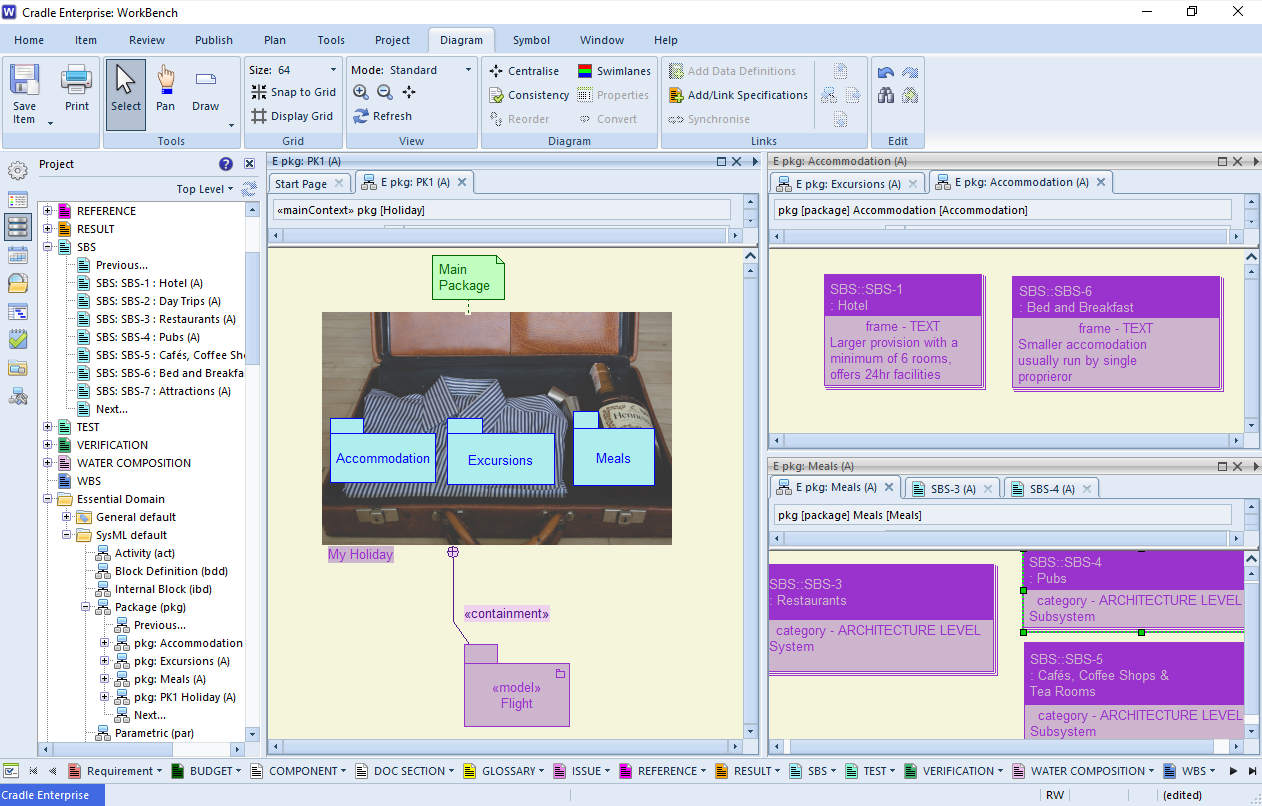
Whatever your system and subsystems or comprise, breaking down the model into its components makes managing development and change easier. The Package diagram in SysML does not have to show all components, but it can usefully draw to mind those that are dependent or interrelated in some way.
If your business is well organised and you have confidence in your systems, enjoying a break should not be a worry. Feel free on World Tourism Day, which promotes sustainable holidaying, to plan your next vacation, or purchase a package from 3SL.
Source document versions can be deleted from the Project sidebar, the same way as regular items. When you delete a source document version, all cross references (source statements) to the captured items are also deleted. Previous versions of the source document and their cross references (source statements) are NOT removed.
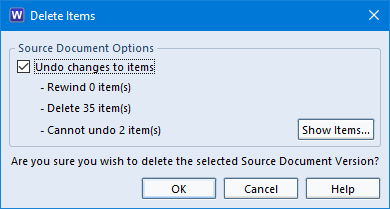
WorkBench only shows the most recent version of a source document. So for example, if you were to delete version 4 of a source document, then version 3 will now be the latest version and will be shown in the Project sidebar.
If you delete version 1 of a source document, then the source document is unregistered and deleted from the PDB altogether.
For further information on how to delete source document versions please click here.
Deleting formal documents is similar to deleting standard Cradle items.
When a version of a formal document is deleted, Cradle will:
For further information on how to delete formal documents read the Cradle help.
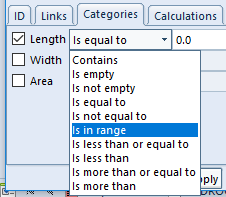
When running a query it is possible to specify more than just a single value. Categories and calculations with a numeric value can be queried to exist in a range. For example querying a range for categories, or calculations that have a numeric value can be tested for the mathematical values:
It can also be tested against the logical
or textually
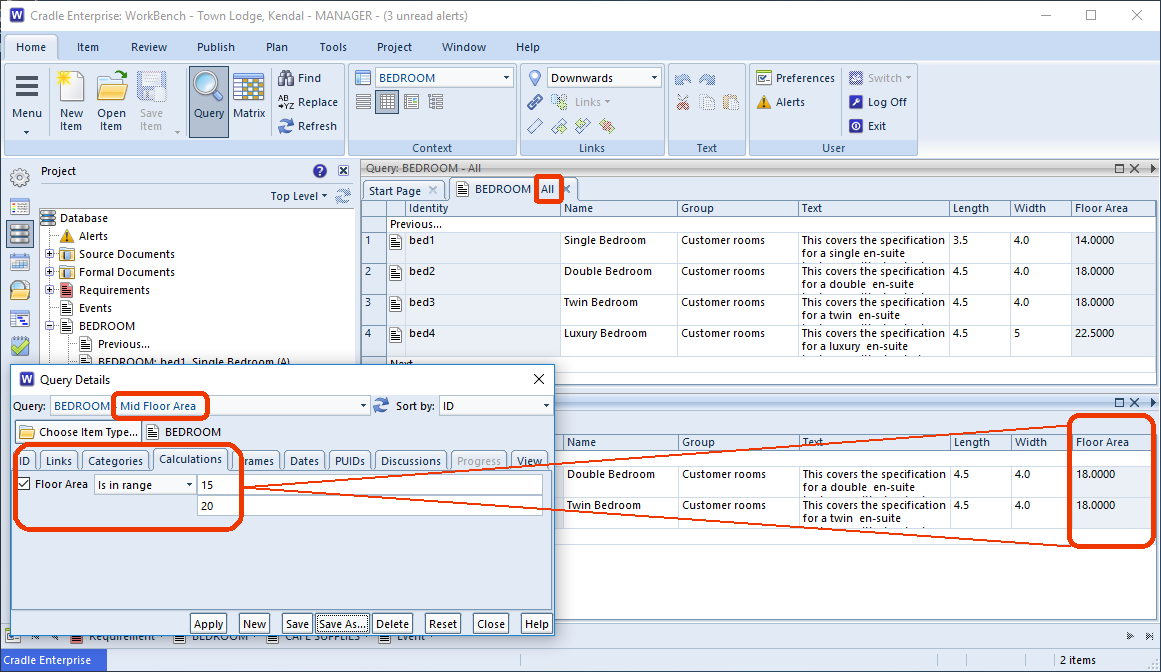
The following screen shot shows the result of running a query against all of the item type and re-running with a range calculation.
The top half of the display shows the calculation having 14m2 up to 22.5m2, but the query Mid Floor Area limits the return to those between 15m2 and 20m2.
It’s possible to calculate values for display, query upon or to set a category within a Cradle item. Calculations can perform basic addition, subtraction, multiplication and division.
Rule Sets can be used to set values based on categories and calculations where the value is based on logic matching rather than on simply the mathematical result.
A quick way to see calculation values without changing the View or Form
When deleting items you are presented with options that relate to the scope of the operation. The scope determines whether just a single item is deleted, or an item together with its supporting definitions, or an item and the hierarchy of items linked to it by cross references.
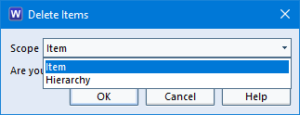

You can delete any number of items at the same time (in WorkBench, items can be deleted one at a time through Web Access). You must have read-write access to an item to be able to delete it is available through the context menu (right-click) or on the Item menu.
When you delete the last instance of an item, that is, if there are no more versions or drafts of the item after it has been deleted, and the item isn’t in a recoverable state, Cradle then automatically removes all cross references to and from the item. This ensures that there are never any dangling cross references in the database, that is cross references to or from items that do not exist.
The Delete operation has the same scope option as the Copy operation, with the same possible values and meanings. These are:
Please note the DELETE_ITEM privilege is required to delete items in the database.
If you are worried about a user being able to delete an item, it is possible to restict this user from this privilege, this is done via the “User Setup Privileges and Rights”
Cradle Help covers more on the steps on how to delete your items .
It is usual to delete items when they are in a draft state. This is where the item is still in a fluid state and alterations are occurring frequently. When applying formal control (Configuration Management*) to a project, it’s normal to superseded or retire items when they are updated or no longer required. This maintains the full traceability through the project’s development. An overview of this formal control is detailed in the Cradle Help.
*Available in Cradle Enterprise
There is a recoverable facility which allows you to recover deleted items:
https://www.threesl.com/blog/how-to-recover-deleted-items/
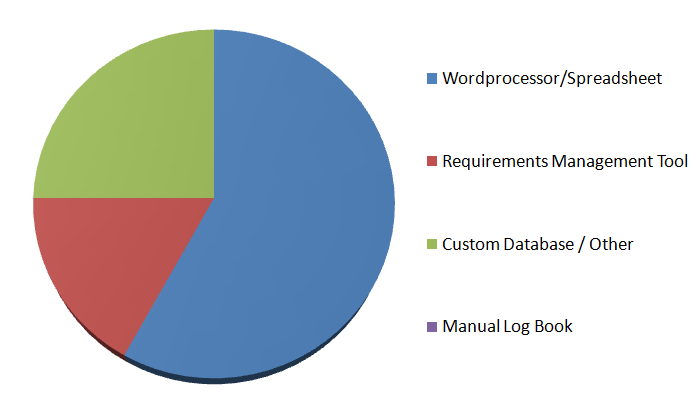
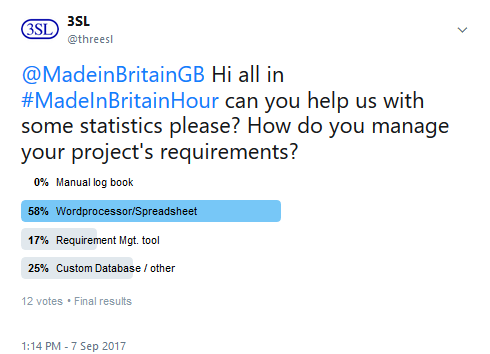
OK, so the tool poll was very small and not necessarily scientifically significant, but it does indicate that not everyone has seen the light. And it gives us some data to draw the nowadays ‘mandatory’ info graphic!
As a young student, I remember being introduced to ‘Office‘ applications on a special ‘visit’ to a college. We were shown a spreadsheet and a word-processor. During the hands on task we were all asked to write something. A fellow student completed their piece but couldn’t understand why their work preview looked different to everyone else’s. Whilst all the words were there they were spaced in an odd manner. They’d used the spreadsheet, and entered a word in each cell and changed the columns until the text fitted. Whilst this is laughable now, the fact is the tool still allowed the job to be completed, still allowed the brief to be met. However, the result, using the wrong tool, was not as useful. Imagine trying to cut and paste a sentence into the middle of an existing clause….
A requirements management tool is adapted to aid the flow of requirement through design to testing and end of life. Items are linked in the project’s chain, unlike a design attribute in one document, vaguely referring to some version of a requirement in another.
NO! We wouldn’t, which may sound surprising from a tool vendor. If you make cupcakes and you get an order for 24 cakes 12 blueberry and 12 chocolate we would suggest a spreadsheet with a sheet of costings and a sheet of orders is probably enough, even a diary with the order written in the day before collection day would suffice. We really don’t want you to spend your money on an inappropriate tool. Spend it on some new icing nozzles and deliver us a batch of cakes. However, if you produce tens of thousands of cupcakes for a number of different vendors and have numerous suppliers, recipes and food standards to meet, well we could conceive of a Cupcake project as a set of Requirements and associated items that needed to be managed. Supplier X changes their ingredient, which products does this affect?
Away from food, before we all feel hungry, we can confidently say that YES the more complex your product, the more components, stakeholders, standards and tests you have to mange, the more important the right tool. The easier traceability becomes, the easier changes can be made and impact calculated. Don’t try laying bricks with a spade, just because you have one in the shed. Don’t try turning precision parts with a drill and a file just because it appears to work. Don’t try and write a novel in EMACS just because it is an extremely powerful text editor . DO use the right tools for the job,
Seeing the light, are you viewing your projects through rose coloured spectacles? Windows and Doors do they need RM (Requirements Management)?
“So me Lads and Lasses, what brings you to 3SL’s shores today?”
“You say your project’s all headed to Davy Jones’s locker?” “What do you say you’ve been using to organise it?”

“Parchment and a pen ye say? Well no surprise it’s not shipshape”
“A landlubber salesman wanted how much silver to give you tools for the job?” “Shiver me timbers, that’d be a right hornswaggle of a deal. Let me at him and I’ll have the scallywag keelhauled” “He’s trying to make you into shark bait, he’ll give pirates a bad name”
“Trust an old seadog like me, more of a privateer you see. Here to keep the pirate salesmen at bay. If you cross me palm with a mere four hundred coins I’ll have ye a top of the range tool for the job. What more could ye want?”
You’ don’t need to talk like a pirate to speak with 3SL, and we certainly won’t be giving you a bad deal. With Single user products in the £249 to £399(Sept 2017 prices) and competitive Enterprise products, there’s always a Cradle to suit your loot.
The recoverable status means that when you delete items, they are not removed from the database, but is placed into a recoverable state from where you can restore the item if you need to. The ability to recover deleted items in this way is similar to the Trash folder you may find on a mail program or Bin on an operating system home screen. When an item is restored all cross references to/from the item are also restored.
To set the recoverable option you need to set the Enable recovery of deleted items option within the Miscellaneous section in Project Setup:
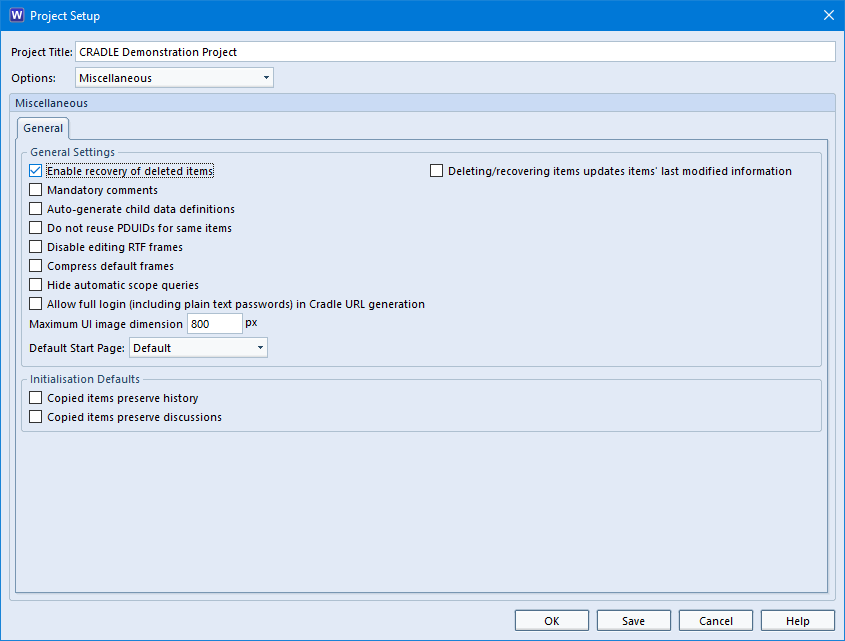
You will notice when you select this option the Deleting/recovering items …. option becomes enabled. This controls whether deleting a draft item (making it recoverable) should also modify the item’s last modifier/last modified date/time attributes. If set, this also affects those attributes when recovering an item, i.e. the date/time will reflect when the item was recovered.
To really delete items from the database you can either:
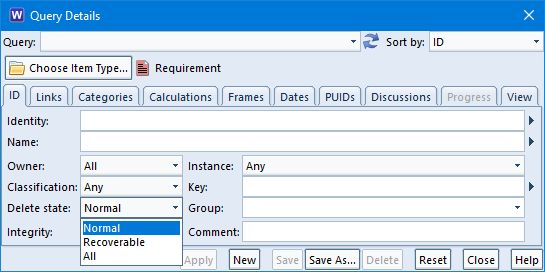
You can view the recoverable items by using the Delete State element in queries:
Tip: You can stop users from deleting items by disabling the delete item privilege in user setup. We feel that deleting an item is more of a project admin task and not for general users.
As you can see there are three values:
Read the Cradle Help for information on how to recover deleted items.
When items are deleted (i.e. placed into a recoverable state) and change history is enabled for that item type, a comment of Item deleted is added to the change history of the recoverable item. Also, if the item is recovered a comment of Item recovered is added to the change history.